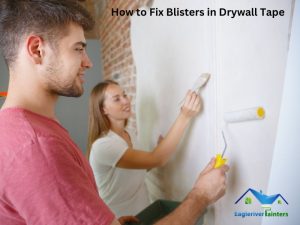
Blisters in drywall tape are a common issue that can ruin the smooth finish of your walls. Have you noticed those unsightly bubbles and wondered how to get rid of them? Don’t worry—you’re not alone, and you’re in the right place! This guide will show you how to fix blisters in drywall tape, so you can achieve flawless, professional-looking walls without breaking a sweat.
What to Expect in This Guide:
- Simple, actionable steps for fixing drywall tape blisters
- The tools and materials you’ll need
- Expert tips for preventing blisters in the future
- Answers to common questions and concerns
Why Blisters Happen in Drywall Tape
Blisters form when the drywall tape doesn’t properly adhere to the drywall surface, often due to air pockets trapped underneath the tape. Common causes include:
- Moisture: Excess moisture can weaken the adhesive and cause bubbling.
- Poor Application: Rushing the job or not applying enough joint compound can lead to blisters.
- Temperature Fluctuations: Extreme hot or cold conditions affect how materials dry and cure.
Pro Tip: Make sure the room temperature and humidity levels are stable when you’re working on drywall to avoid issues like blistering.
Tools and Materials You’ll Need
Before you start, gather these tools and materials to ensure a smooth process:
- Utility knife or razor blade
- Joint compound (also called drywall mud)
- Drywall tape (fiberglass mesh or paper)
- Putty knife or taping knife (6-inch or 12-inch, depending on the area)
- Sandpaper (fine grit)
- Drywall sander (optional)
- Primer and paint (for the final touch)
Once you have everything ready, you’re set to begin repairing those frustrating blisters.
Step 1: Cut Away the Blistered Tape
The first step is to remove the damaged area of the tape. Use a utility knife to cut a small “X” across the blister, then carefully peel back the lifted tape.
- Make sure the underlying area is free of dust or debris. This will help the new tape stick better and prevent further problems.
Step 2: Apply Fresh Joint Compound
Once you’ve removed the blistered section, apply a thin layer of joint compound to the exposed area. You want enough compound to act as glue for the new tape but not too much that it causes new bubbles.
- Tip: For a stronger hold, use fiberglass mesh tape instead of paper tape, especially in high-moisture areas like bathrooms.
Step 3: Lay Down New Tape
Press the new tape firmly into the fresh joint compound. Smooth it out with your putty knife, starting from the center and moving outward to eliminate air pockets.
- Check for bubbles as you work. If you see any, lift the tape slightly and smooth it again.
Step 4: Apply Additional Layers of Compound
Once the new tape is securely in place, apply another layer of joint compound on top. Feather the edges to blend it seamlessly with the surrounding wall. Let it dry for 24 hours.
- You might need to apply two or three thin layers, sanding between each coat for a perfectly smooth finish.
Step 5: Sand and Paint
After the final coat of the joint compound is completely dry, sand the area until it’s smooth and level with the rest of the wall. Once sanded, prime and paint the area to match the rest of your wall.
Pro Tip: Use fine-grit sandpaper and avoid over-sanding to prevent damaging the newly repaired area.
Common Mistakes to Avoid
- Skipping the Primer: Always prime the patched area before painting to ensure a uniform finish.
- Overloading Compound: Too much compound at once can create new bubbles or cracks. Apply thin, even layers instead.
- Not Standing Properly: Uneven sanding can leave the repaired area looking bumpy or rough. Take your time to smooth it out!
Preventing Future Blisters in Drywall Tape
Prevention is better than cure! To avoid dealing with blisters again, follow these tips:
- Control Moisture: Make sure the walls are dry before applying the tape. Moisture can weaken the joint compound and cause bubbles.
- Use the Right Tape: Fiberglass mesh tape works better in moisture-prone areas than paper tape.
- Apply Compound Correctly: Don’t rush! Ensure you’re applying the joint compound evenly and with enough pressure to bond the tape to the drywall.
Expert Tip for Long-Term Results
To ensure long-lasting results, use high-quality joint compounds and drywall tapes. Some cheaper materials may seem like a good deal, but they can lead to more frequent repairs down the line.
For more detailed information, you might want to check out technical guides from organizations like the Gypsum Association or read articles from Fine Homebuilding Magazine, which offers expert insights on all things drywall.
Why Proper Drywall Repair Matters
Fixing blisters in drywall tape might seem like a small task, but it’s essential for maintaining the structural integrity and aesthetics of your home. Poorly patched walls can affect your home’s value and lead to larger problems in the future, fixing cracks or moisture damage.
Did You Know? According to a study published by the National Association of Home Builders, homes with well-maintained walls are more likely to sell faster and at higher prices. This simple fix could save you money in the long run!
How We Can Help at Eagle River Painters
At Eagle River Painters, we’re experts in handling all kinds of drywall issues, from minor repairs to full renovations. Whether you’re dealing with blisters, cracks, or major drywall damage, we’ve got the skills and experience to make your walls look perfect again.
Here’s what sets us apart:
- Comprehensive service: We don’t just repair gypsum boards. We have a variety of services. Including interior and exterior painting, electrical work, pipe work, and sand cleaning. Not that you’re looking for shame. We’re here to help!
- Skilled Team: Our team is highly trained and experienced, ensuring every job is done to the highest standard.
- Customer Satisfaction: We go above and beyond to exceed our clients’ expectations, offering top-notch craftsmanship and friendly, reliable service.
Don’t let those drywall blisters ruin the look of your home. Contact Eagle River Painters today for a free consultation, and let us help you achieve flawless, beautiful walls that stand the test of time. Ready to learn more? Explore our other guides on home improvement for expert tips and advice!
Conclusion
Defects in drywall tape are a common but fixable problem. With the right tools, materials, and techniques. You can repair the damage and prevent it from happening again. Be sure to use quality materials. Prepare the grout carefully. And it takes time to get a smooth surface.
If you need professional help, Eagle River Painters is right around the corner. We’re here to help you with all your plastering and home improvement needs. Ready for more tips? Check out our blog about common drywall plastering problems or sign up for our newsletter with more DIY home improvement tips. Let’s make your veggies look perfect together!
Frequently Asked Questions
What causes blisters in drywall tape?
Blisters in drywall tape are typically caused by trapped air bubbles or moisture under the tape. Poor application, like not applying enough joint compound or using tape in a high-moisture area, can also contribute to blistering.
Can I paint over blisters in drywall tape?
It’s not advisable to paint over blisters. Doing so will only hide the problem temporarily. Instead, you should repair the blisters first to ensure a smooth and professional-looking finish.
How can I tell if my drywall tape is blistered?
You can identify blistered tape by looking for bubbles or raised areas on the surface of the drywall. If you run your fingers over the tape and feel unevenness or see visible bubbles, it’s time to repair it.
How long should I wait for the joint compound to dry before sanding?
Typically, you should wait at least 24 hours for the joint compound to dry completely before sanding. However, drying time can vary based on humidity and temperature, so it’s best to ensure it’s fully dry to the touch.
What type of joint compound should I use for fixing drywall tape?
For most repairs, a pre-mixed all-purpose joint compound is ideal. If you’re working in a high-moisture area, consider using a setting-type joint compound, which is less susceptible to moisture issues.